How to: Picture Sheets
From Flat Object to 3D Model
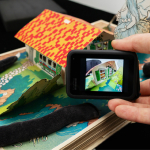
First, we copied, printed, and physically assembled the corresponding picture sheets in order to gain a better understanding of the three-dimensional structure of the ornaments. This hands-on crafting process allowed us to comprehend the spatial arrangement of the individual parts and how they interact in real space. In doing so, we determined not only the number of ornaments produced but also how the individual components are connected to one another


The next step was to digitalize the ornaments using the 3D software Blender. It was useful to first recreate the ornaments in their flat form based on the scanned picture sheets. By creating UV maps and assigning textures derived from the scan data, the surface appearance could be reproduced realistically.
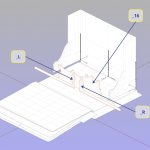
The final step involved simulating the fold lines of the ornaments in Blender. This was achieved by defining specific edges of an object as “active edges,” which serve as pivot points around which adjacent faces can be rotated at defined angles. Step by step, this process resulted in a complete digital 3D model of a Christmas tree ornament.
In the case of the Christmas decorations, this process produces eight different ornaments.
You can find the 3D model here: Christbaumschmuck.

Author: Fenya Troch